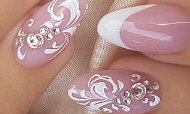
One of the more popular nail styles seen today is ombre. Ombre nail patterns are all over the place and give you a wide selection of looks to choose from. The word ombre itself means "shaded." In nail concepts, any nail that has a shaded look to it – going from light to dark or dark to light – can fall into this category. In nails, the goal is to see a changing pattern. Your nails will go from one color to another color in a slow morphing process.
It's fantastic and beautiful when done well.
You can create ombre nails yourself, though the process can be a bit difficult. To do so,
You'll need to add a base coat to your nails. After a clear base coat, you will need a solid base color next. The goal will be to layer the colors over each other applying them with a makeup sponge. The base color will usually be white or a light color to create the ombre look. When applying white, you'll have a more vibrant color.
After you've allowed your base coat to dry, the next step is to pain the ombre colors you've selected onto a makeup sponge. The area you paint be the width of your nail. Paint a line across of the lightest color, then the next darkest, and finally the darkest.
Then, apply this directly to your nail like a stamp. Blot it until the nail is completely covered. The final step is to place a clear coat of polish over the top. This will help the polish to pop. Do one nail at a time to ensure the color transfers evenly. Take your time to get a fantastic look.
You can use ombre nails in a variety of ways including with various colors, diagonal positioning, and much more.
Less


 'Most-Liked' or 'Most-Added-to'


 Add the nail art to my page


